Guide
Quick photo tip: Time-lapse videos in Photoshop
by David Lee
Lightroom does not have a time-lapse function. With a trick, you can still create a timelapse to your liking.
Photoshop is an application for individual images, Lightroom for an entire image catalogue. That's why I'm surprised that Photoshop has a built-in time-lapse function while Lightroom does not. When I have a whole series of images in Lightroom, I would like to make a video from them straight away. Maybe you would too.
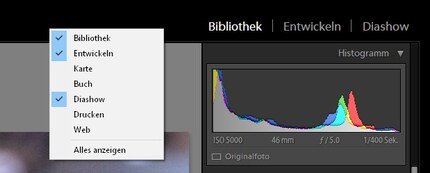
You can do this with the "Slideshow" module. It is located at the top right, where Library and Develop are located. If not, you can show it with a right-click.

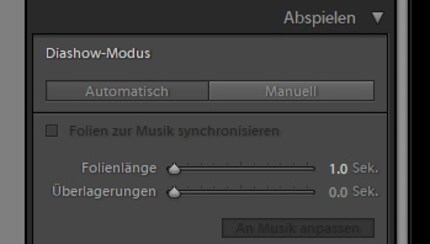
In the slideshow module, you can export the current images as a video. There is a button for this at the bottom left of the screen. The problem: The fastest playback speed is one image per second. This is okay for a slideshow, but not for a smooth video. You would need around 25 images per second for this, so the slide length would be 0.04 seconds.

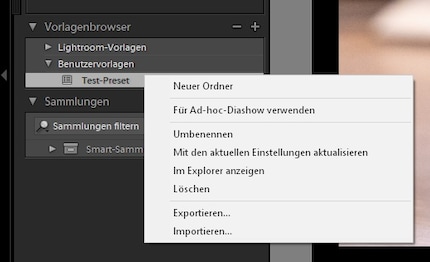
You cannot set the desired speed in the user interface, but you can define it in a template and import it. To do this, first export a template, modify it in a text editor and import it again.

Step by step:
If you want to create several presets with different speeds, save the file under a different name somewhere on the hard drive and then import it into Lightroom: right-click on "User templates" and "Import". The template will still have the old name in Lightroom. You can fix this by adjusting the "internalName" entry in the file or renaming the template in Lightroom.
Note: In the example video above, I chose a template with only ten frames per second, which is not ideal. I have too few images because the candles burned down much faster than I expected.
If you select a folder in the library and switch directly to the slideshow, all the pictures in it are already in the filmstrip. You don't have to select the images separately
.
The images must either already be recorded in the correct aspect ratio (normally 16:9) or then cropped in the Develop module. Otherwise, black edges will appear in the video. Of course, the individual images are also optimised before the video is exported. That's what Lightroom is there for: to edit entire image series.
Do not try to view the video in the main window. You can only see a little bit in the preview window at the top left. In the main window at the bottom right, you can see how long your time-lapse clip will be.
In other words: In the slideshow module, you just click on the preset and export the video. Everything else happens beforehand. Exporting hundreds of images takes several minutes. <p
My interest in IT and writing landed me in tech journalism early on (2000). I want to know how we can use technology without being used. Outside of the office, I’m a keen musician who makes up for lacking talent with excessive enthusiasm.