

Print T-shirts until you drop with the Ricoh Ri 100
The Ricoh Ri 100 is the first textile printer in our range. As a passionate T-shirt printer, I can't pass up the opportunity to take a closer look at this machine.
As a teenager, I used to print all kinds of T-shirts myself. Back then with textile films for ironing on. The principle of the Ricoh Ri 100 is similar. However, unlike the films, I print on the textiles themselves and then fix the design in a separate heating system.

How the textiles are printed
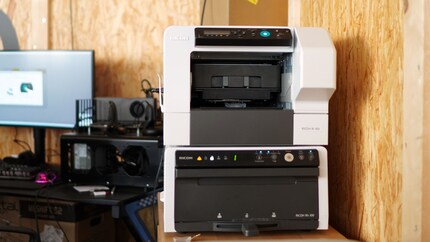
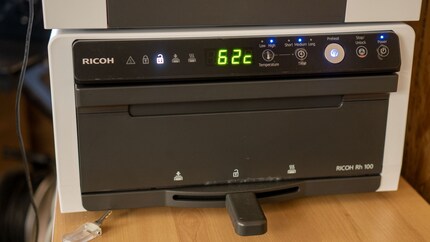
The Ricoh Ri 100 consists of two components: the printer and the heating system. The printer stands on the heating system. This works like an oven with an integrated press. The printer element works like a normal printer, but the nozzles and cartridges are optimised for textiles. Unfortunately, the Ri 100 does not have white ink. The printer is therefore only suitable for white and light-coloured textiles. Ricoh also recommends using as much cotton as possible to ensure good adhesion. The ink does not adhere well to synthetic materials.
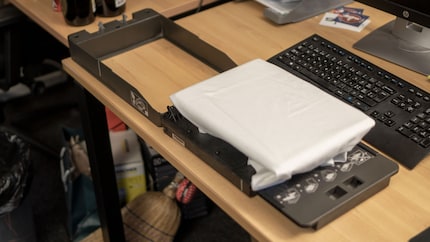
If I want to print, I first have to fix my textile part on the clamping device. The fixture supplied is suitable for cushion covers, sweatshirts, T-shirts, polo shirts and carrier bags. Prints up to A4 are possible.
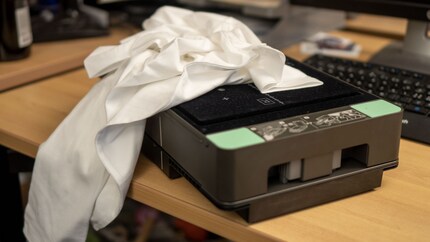
In my short test, I only print T-shirts. To do this, I place the shirt with the desired print area facing upwards on the clamping device, push excess fabric under the device and clamp the T-shirt. Then it goes into the heating system for 30 seconds at 180° Celsius. I can set the temperature and time to suit the fabric. I turn the lever of the heating system to the left. This presses my shirt. If I move the lever to the right, the printed fabric is fixed. I'll get to that later.

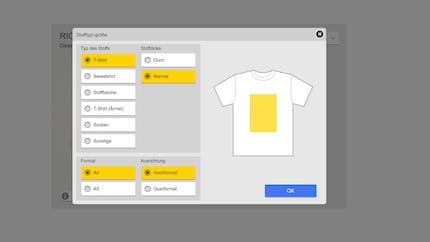
When the time is up, I am informed by a beep. A countdown on the display also shows the remaining time. After pressing, I insert the clamping device into the printer. As soon as the jig clicks into place, I can start printing. I need the Ricoh Design software for this. I first select the fabric type, thickness, format and orientation. In the next step, I import my design and define its position in the print area. First, I print a template from Ricoh.
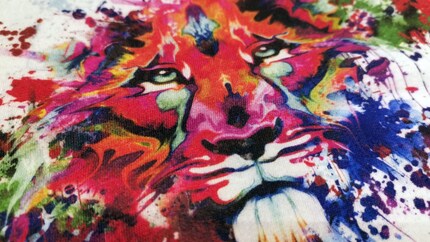
I have connected the printer via USB, a connection via WLAN or Ethernet would also be possible. I forward the job to the printer and now only have to confirm the print on the device itself. The device then retracts the clamping device and starts printing. The time required for this depends on the size of the subject. In the case of the lion, it takes about 50 seconds for the printer to extend the clamping device and for me to see the result. But I'm not finished yet.
Now the shirt and tensioner go back into the heating system. This time, instead of pressing, I set the lever to fusing. The process takes 30 seconds for a T-shirt. I then set the lever directly to Press. This time for three minutes, as recommended in the instructions for T-shirts. I then remove the tensioning device from the heating element and stretch out the shirt. Cool, I see a lion grinning at me in various shades of red. The print quality impresses me, it looks like a purchased shirt.
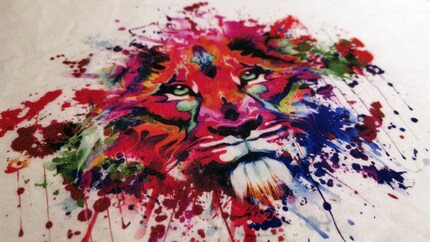
Print quality
Next, I'll try a difficult image. Colleague Martin Jud was recently in New York for the presentation of Microsoft's new Surface products. He filmed himself talking about the Surface Laptop in a sea of flowers. I am printing exactly this picture. It's not difficult because Martin is in it - although that's certainly a challenge for the image processor - but because the image has lots of colours and is very bright. Since the Ricoh 100 doesn't have white ink, I'm curious to see how it displays the image.

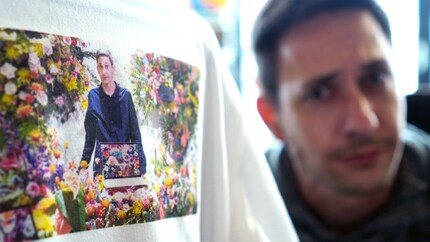
I'm happy with the result. Sure, the colours aren't quite as bright as the original, but that's due to the cotton used as a printing base and the brightness of the image. The weird bird that has crept into the background (Martin) also detracts a little from the end result, but on the whole I think the print is great for the original. The printer did a great job with the white areas. Incidentally, Martin doesn't have white hair in real life.
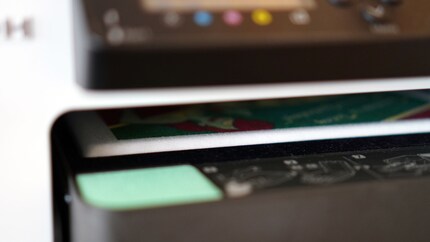
The print quality impresses me across the board. The Ri 100 also manages the large Futurama subject well. I want to know how well the prints hold up after several washes. I wash the lion shirt five times at 30° Celsius and tumble dry it afterwards. Even after the five washes, the colours are still vibrant.
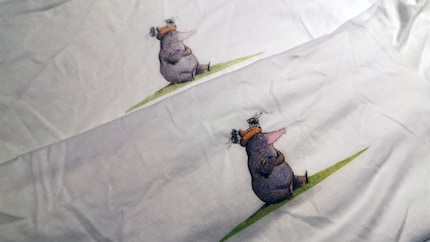
I am also interested in the importance of fixing and subsequent pressing after printing. I print the same subject twice: the little mole who wanted to know who hit him on the head. Once I press and fix after printing and once I don't. After just two washes, a clear difference is visible. The unfixed and pressed subject is faded compared to the fixed and pressed one.
Two points of criticism
Although I have praise for the Ricoh Ri 100, I also have two criticisms of its printing. Although the first is more my fault for not paying enough attention. The software reads JPEG or PNG files. For one print, I selected a PNG file because no JPEG was available. I inserted the PNG file and saw on the preview that the transparency layer (the grey checkerboard pattern on PNGs) was displayed. I didn't think anything of it and went ahead with the print. The printer then actually printed the transparency layer for me and so the T-shirt was destined for the rubbish bin right from the start. It was probably not a "real" PNG and the software indicated this correctly by also displaying the transparency layer. Caution is advised when printing with PNGs.

The second point of criticism concerns the clamping device and this is most likely also due to my inability. I never really managed to position the T-shirt so that I printed exactly where I wanted. Not even with tips from Youtubers.
Great piece of kit, but who is it aimed at?
I had a lot of fun with the Ricoh Ri 100 and the print quality really impressed me. I've only scratched the surface when it comes to printing options. I could have printed other textiles apart from T-shirts and played with the settings a bit. The two criticisms I have of the device can easily be eradicated with a little practice and more attention.
I ask myself who needs a printer like this? Just under 4500 francs for the device is too expensive for a private individual. The printer is aimed more at small print shops or small shops that want to offer something more, but I can also imagine that schools or clubs could be buyers. The Ri 100 is a good textile printer for them.
From big data to big brother, Cyborgs to Sci-Fi. All aspects of technology and society fascinate me.


